contact us

Use the form on the right to contact us.

You can edit the text in this area, and change where the contact form on the right submits to, by entering edit mode using the modes on the bottom right.


123 Street Avenue, City Town, 99999

(123) 555-6789

email@address.com


You can set your address, phone number, email and site description in the settings tab.
Link to read me page with more information.

2014-09-14 07.31.25 1.jpg

house blog

projects around the house


Filtering by Tag: fence

a small front garden fence.

jenn pan

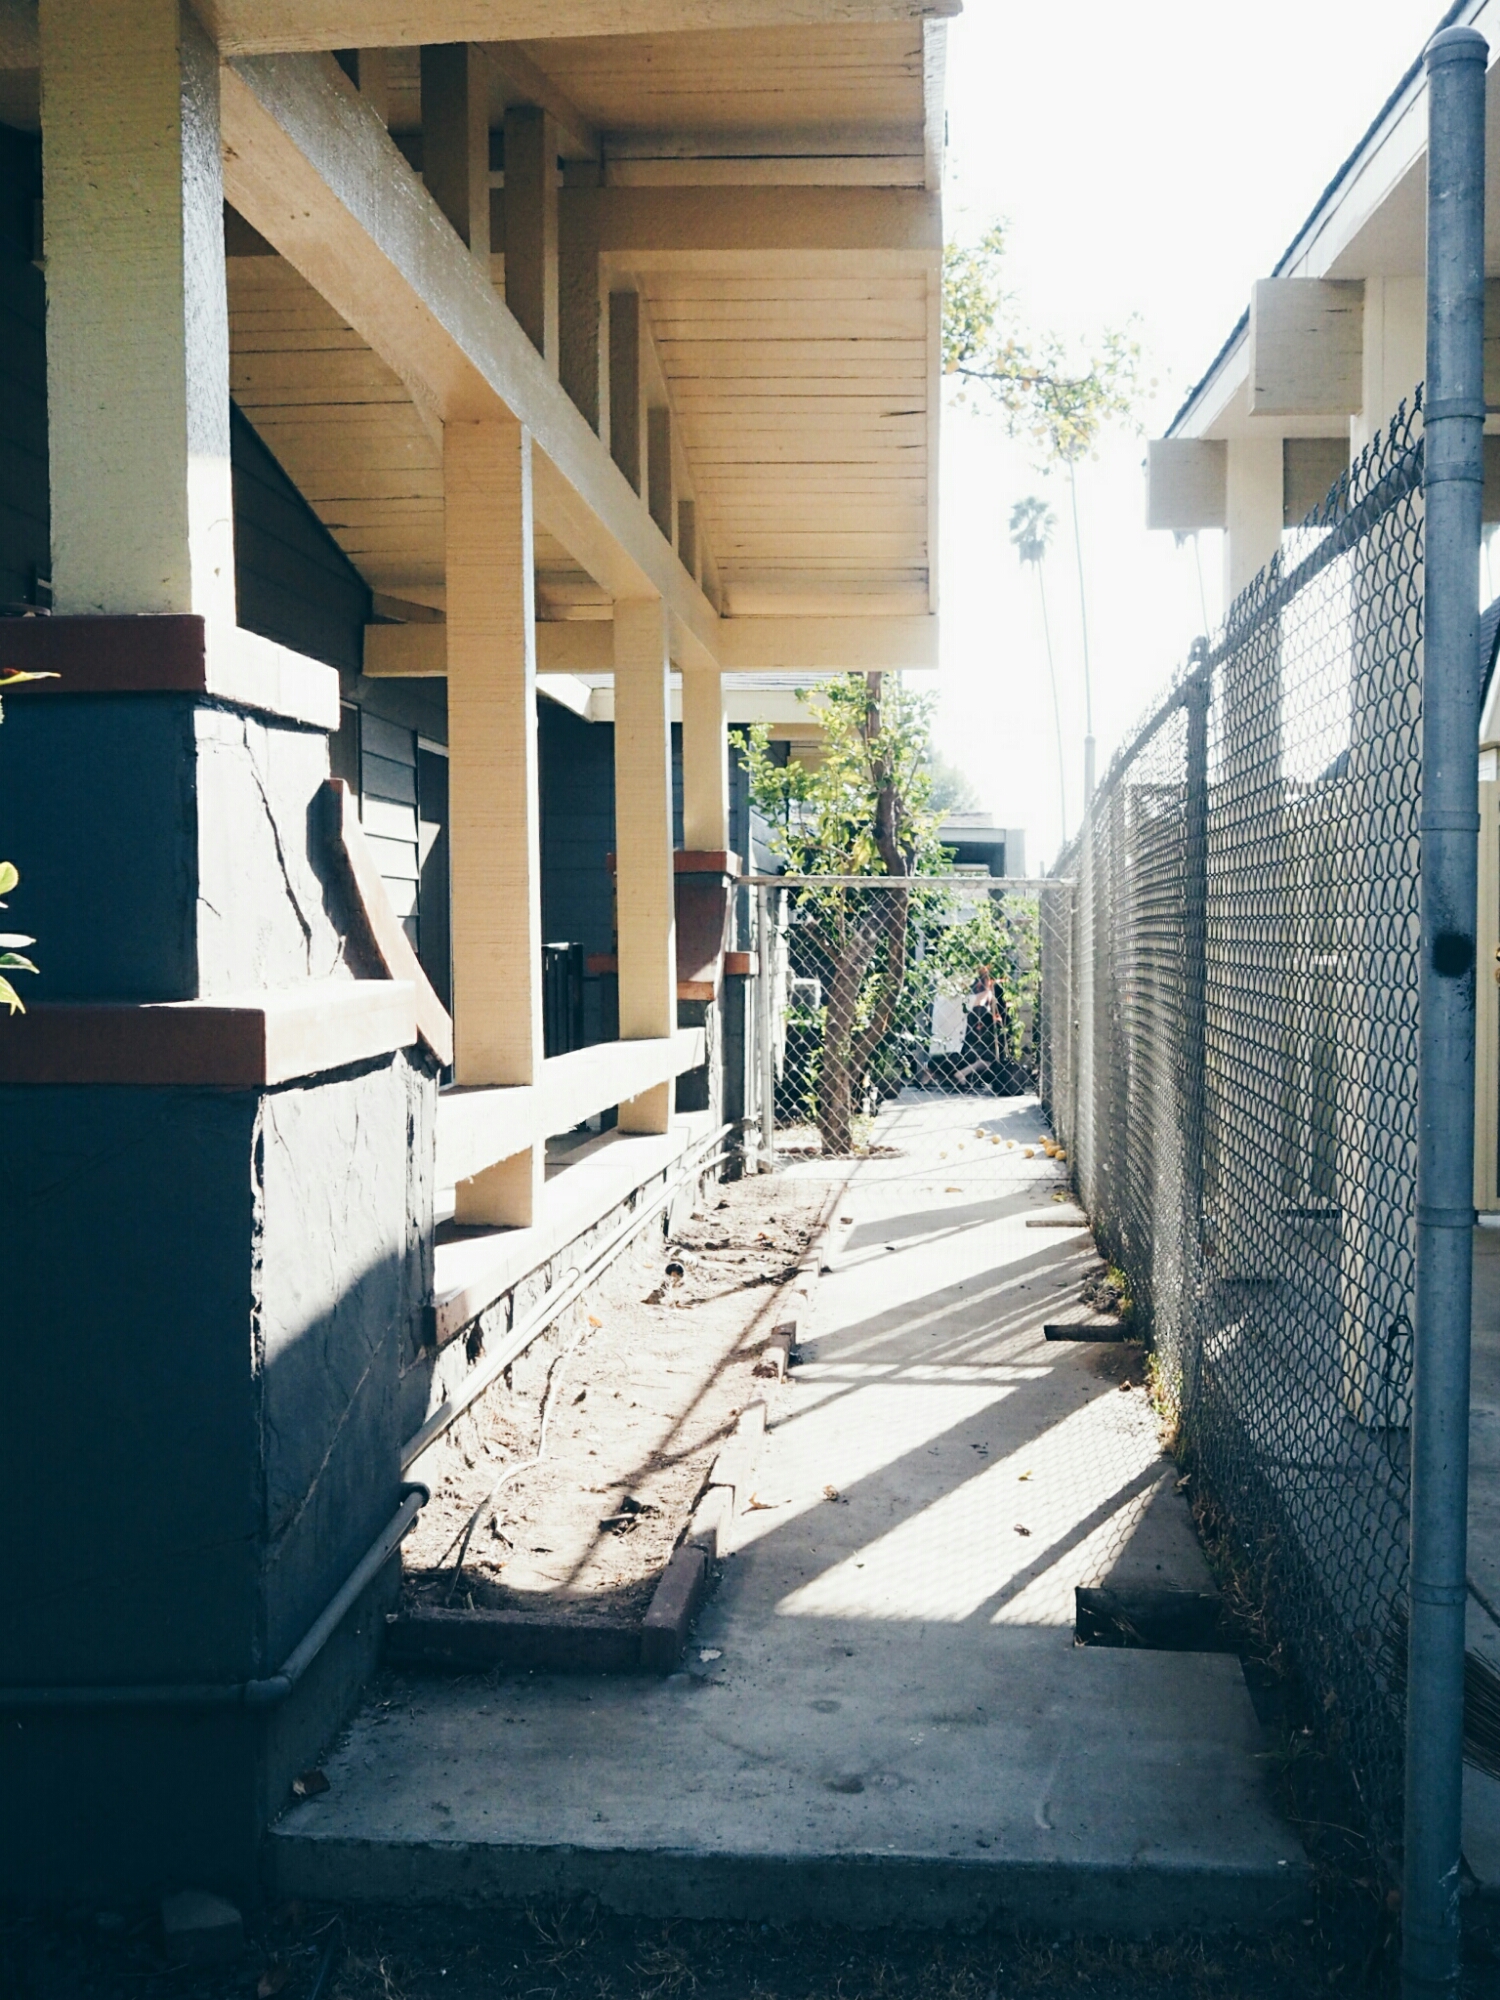
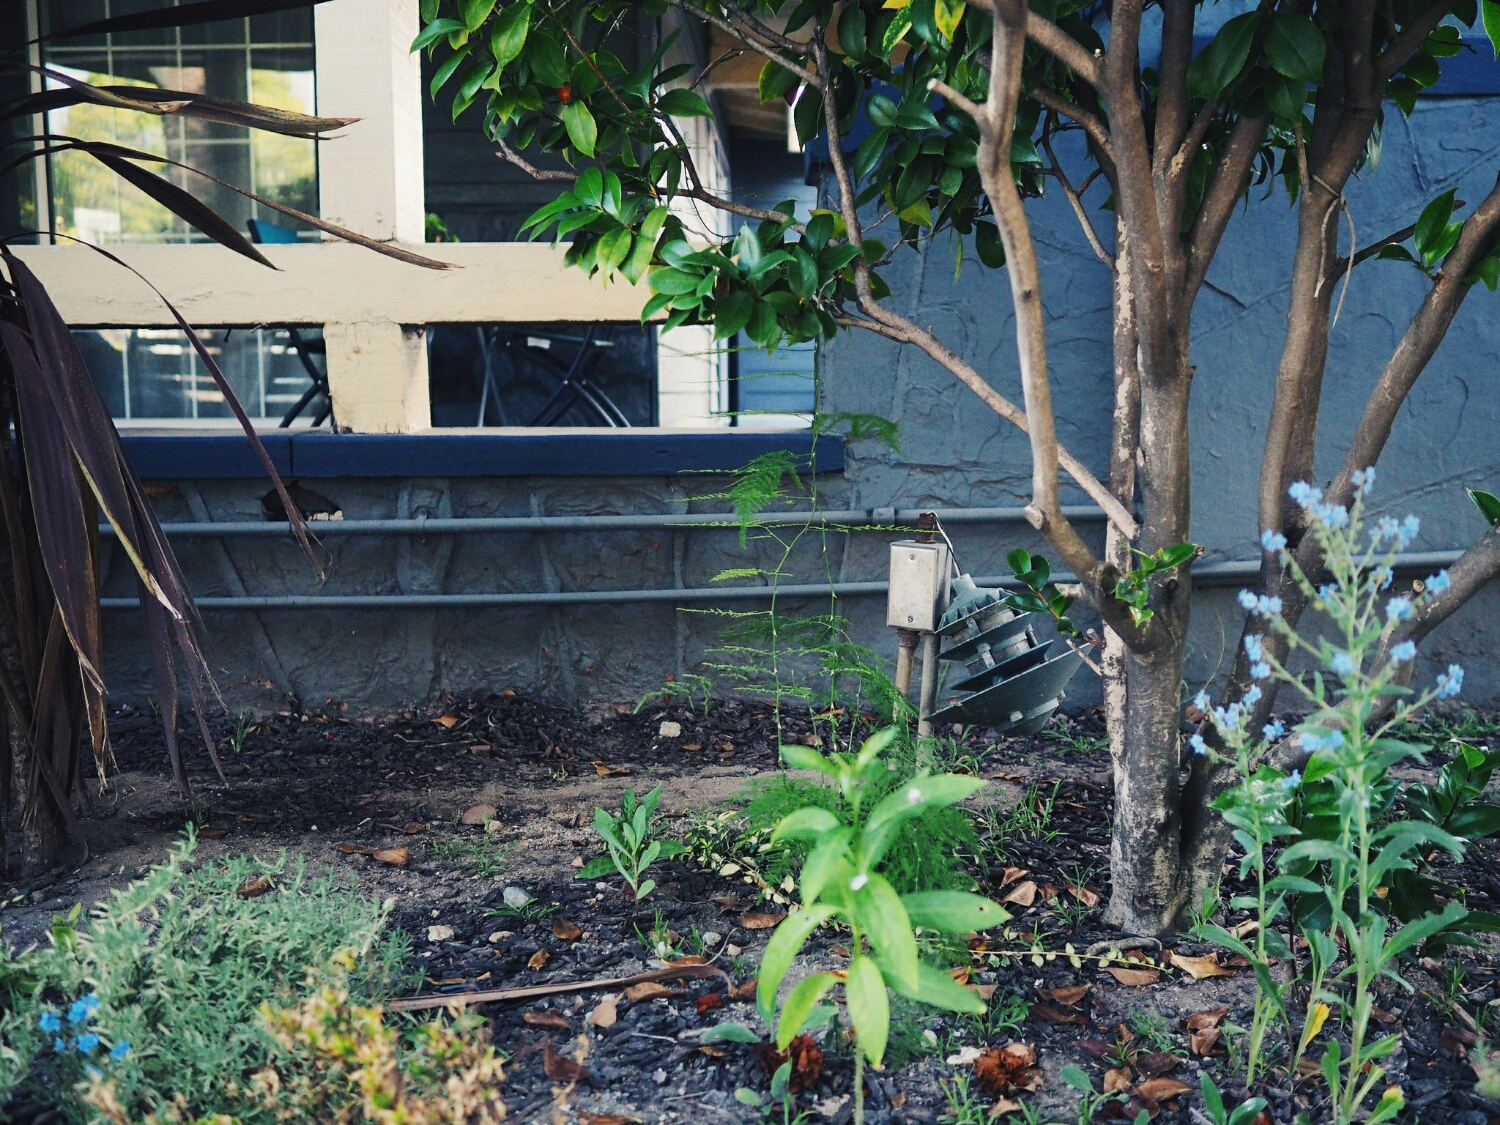
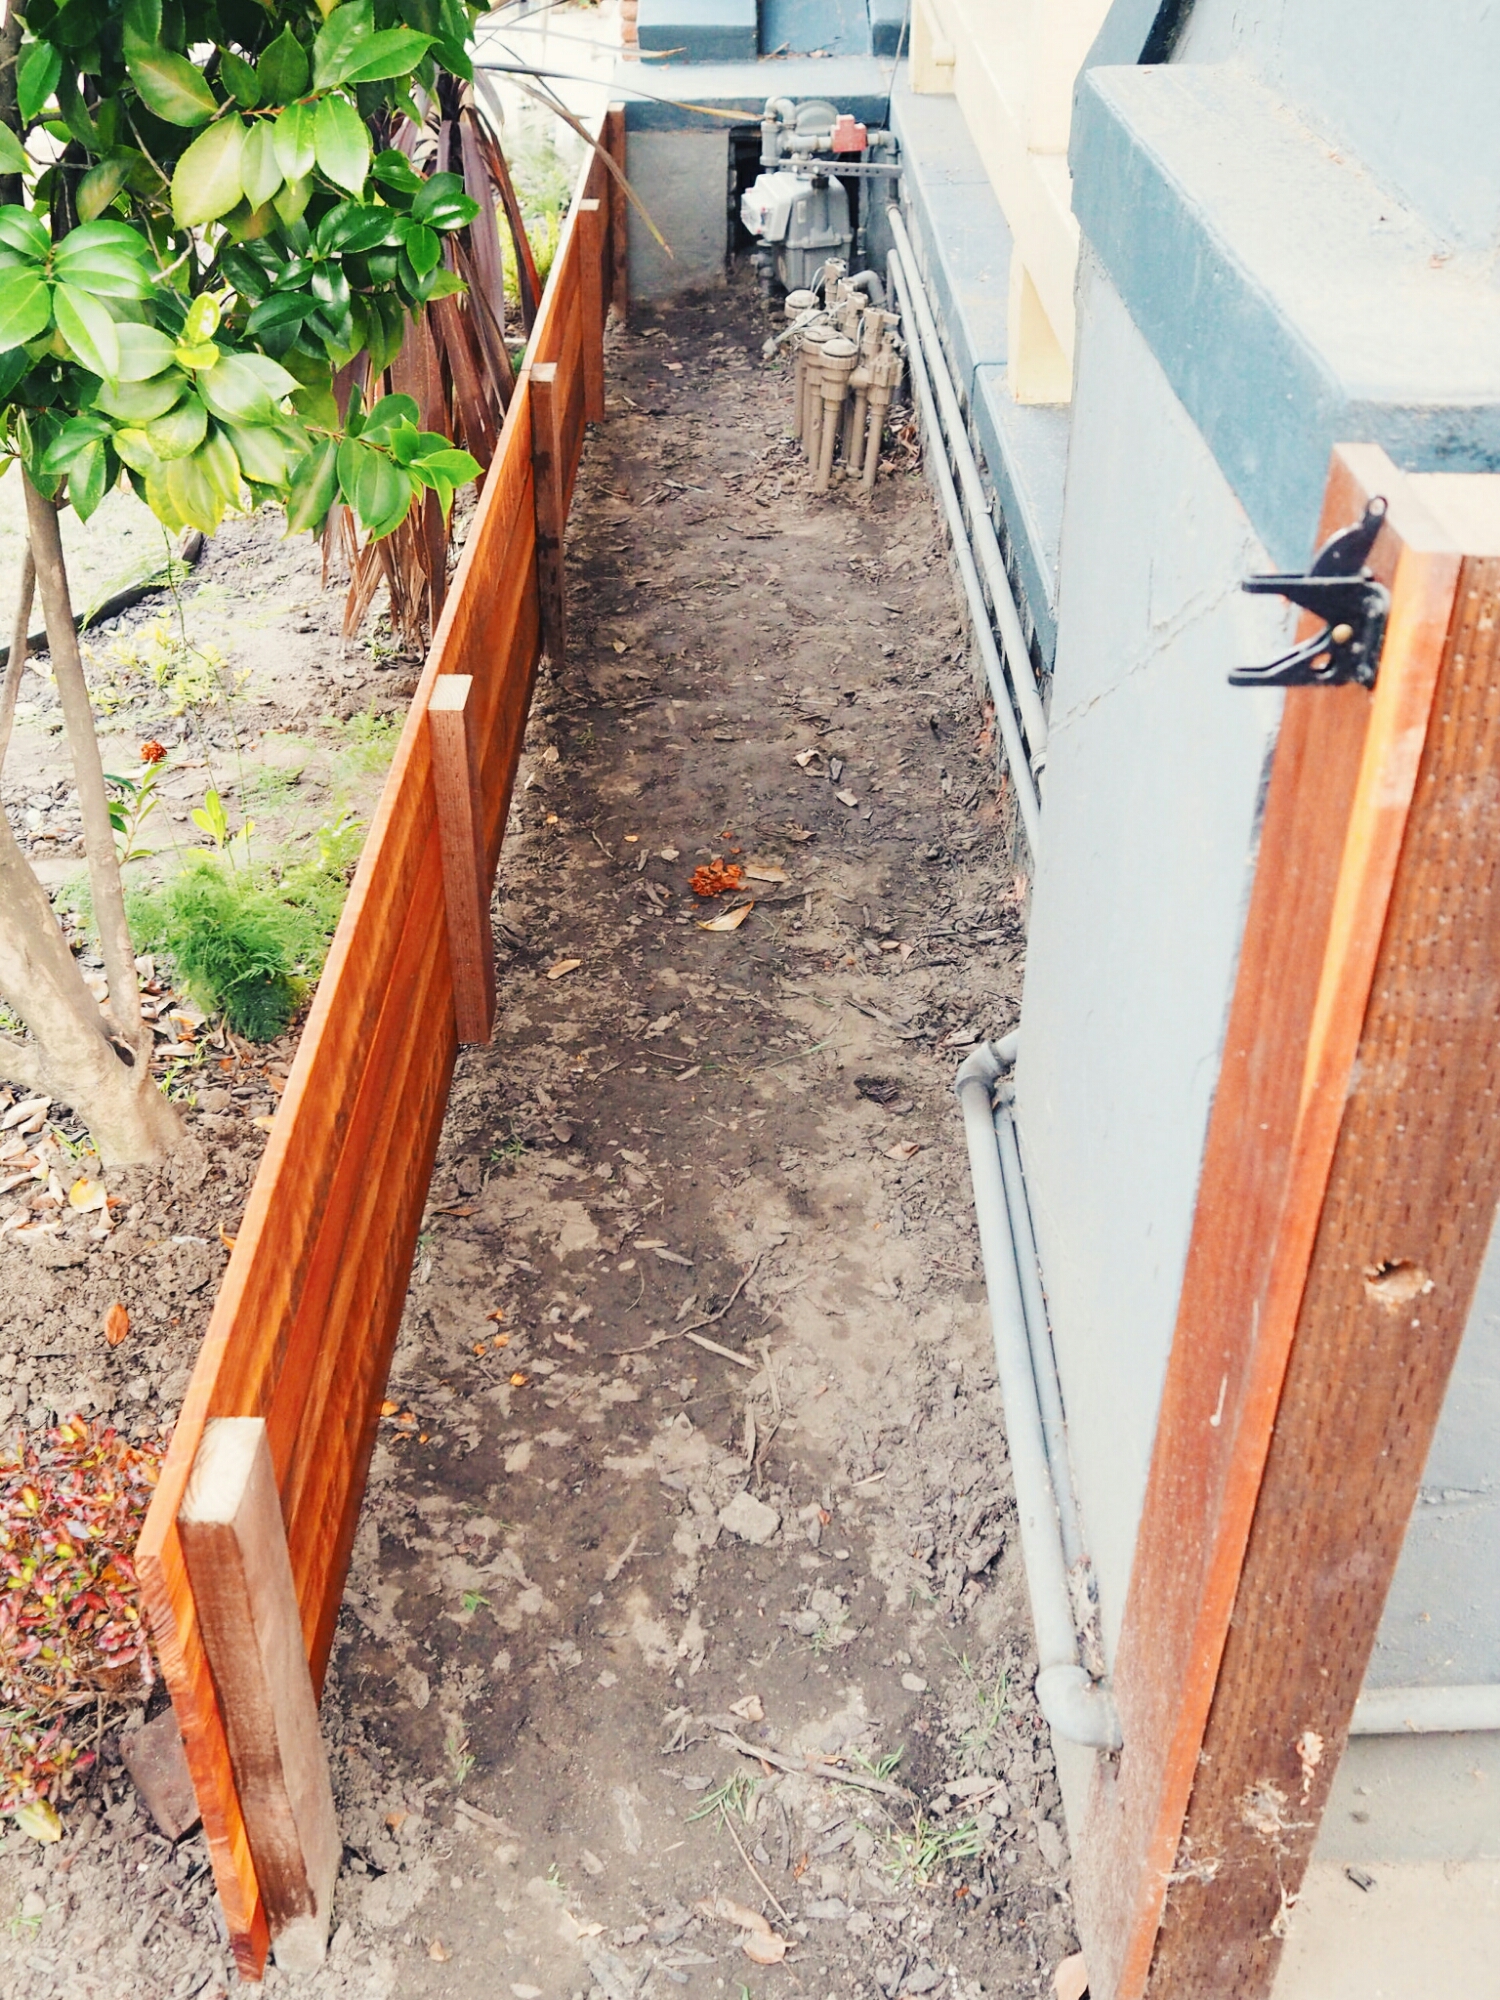
we're slowly working on upping the curb appeal of the house. well, except for the yard, which we've stopped watering the lawn because of the drought so that's dying a slow, ugly death. anyway, there are utilities in the front of the house, that then run along side it. the pipes are painted the same color of the house, and there's a small garden bed in front of it, but they're still pretty visible.

upload.jpg

in addition to that, at some point there were wired lights put into the garden, but they have never worked since we first bought the house, and they were even starting to fall apart. we finally decided to do something about it!

upload.jpg
upload.jpg

first we dug up those busted lights. at some point, the pipe just ends and becomes buried wire. that's not dangerous or anything... luckily, they were literally not connected to anything, and we were able to just pull them up!

upload.jpg

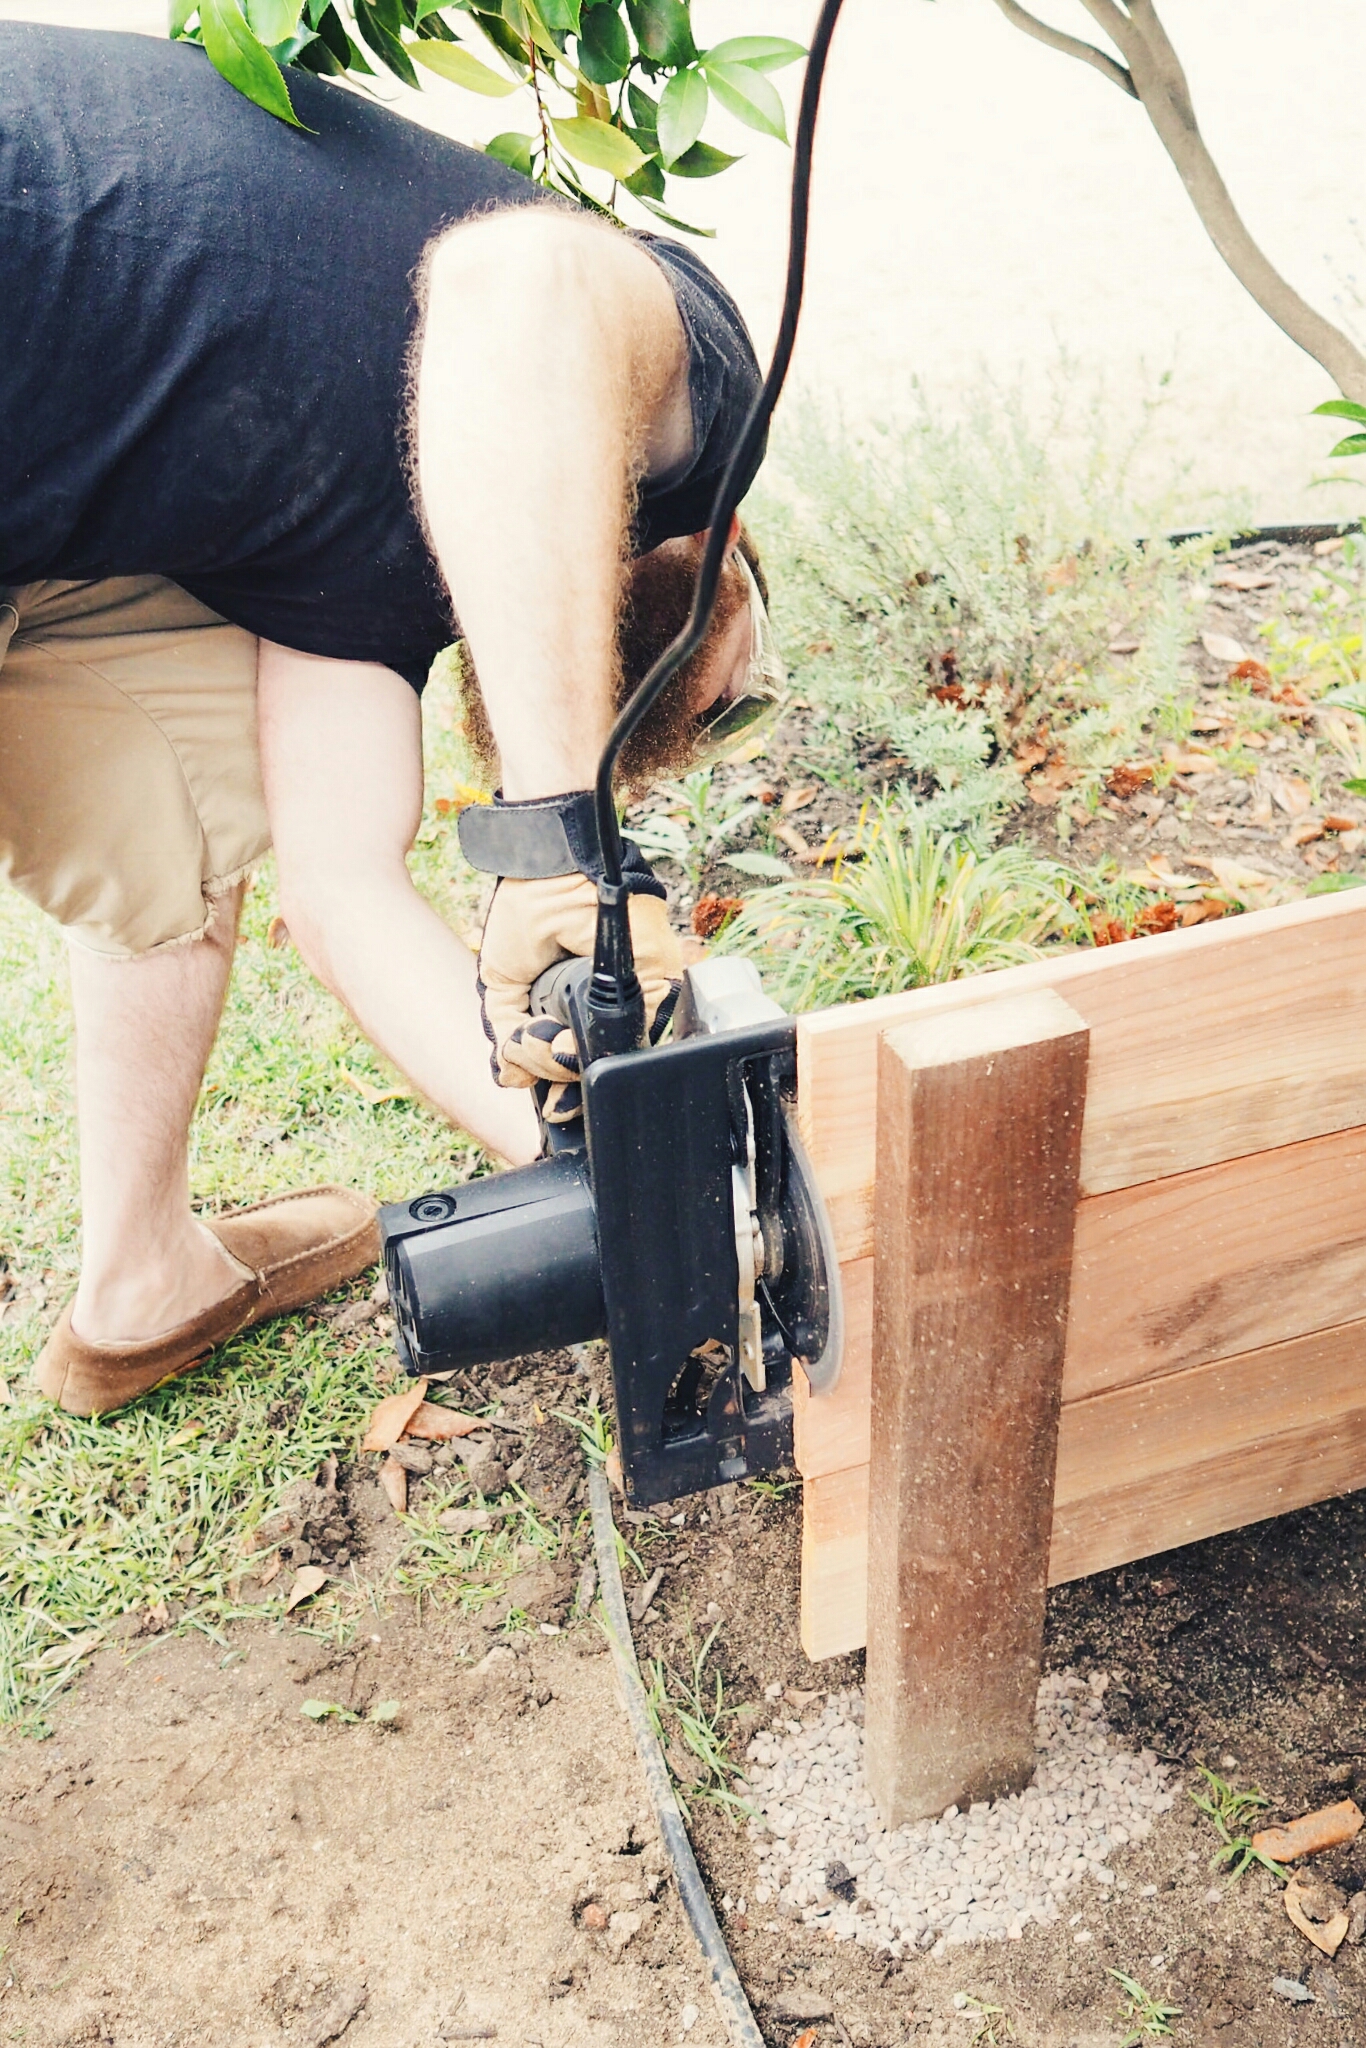
one of the lights actually ran under the gas and water mains, and since we felt uncomfortable trying to dig it around those things, james just ended up sawing that one off several inches into the ground.

upload.jpg

we cleaned up everything toward the back of the garden, moved a few plants, and started working on putting in a small redwood fence to match the fence and gate that went in a few months ago. we used some string to mark where we wanted the top front of the fence to go and then dug three one-foot-deep holes for posts.

upload.jpg
upload.jpg
upload.jpg

we used pressure treated two-by-fours and quickrete fast-setting concrete mix for the posts. after letting it set overnight, we filled the remainder of the holes with some drainage rock, and used a circular saw to cut off the excess post.

upload.jpg

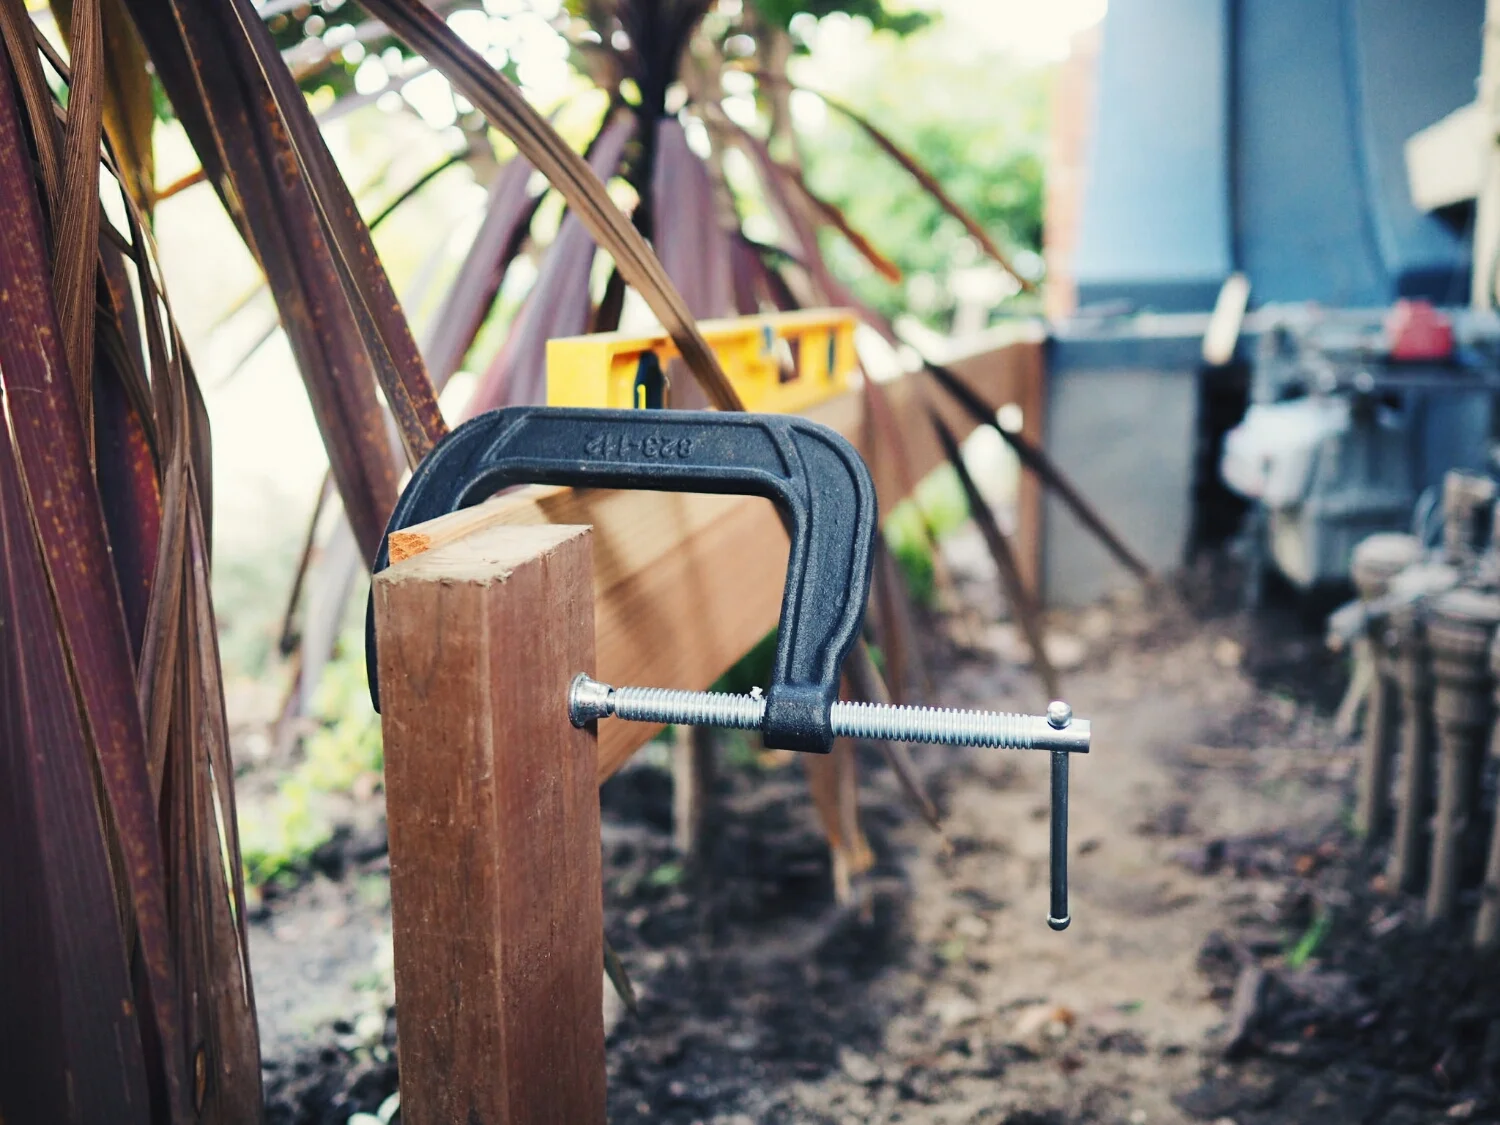
we bought eight foot long six-by-one redwood for the fence itself, which matched most closely with the big fence. for this project, we bought some new toys from harbor freight! a three gallon air compressor and 18-gauge brad air nailer, both central pneumatic. we were going to just use a drill and screws, but this matched the way the fence was done and was so much faster, and easier, and totally worth the purchase.

upload.jpg
upload.jpg

the circular saw came back out to clean up the edges and then we stained it with the same penofin clear redwood stain that was used on the fence (pluse, we still had plenty leftover). some of the plants actually touch our new mini fence, so we had to get creative during the staining process..

upload.jpg
upload.jpg
upload.jpg

after the stain was dried and the fence was finished (yay!) we added landscape barrier, stepping stones and pea gravel just to clean up the space and make it really look like a nice access area for the utilities.

upload.jpg

we are pretty proud of ourselves! this is our first real DIY construction project! we've been slowly building up the tools we need over various small projects, and it really felt like we finally had the right tools to get this done without spending ridiculous amounts of money. getting this and the rocks into the side yard has made us really excited to get back to doing house projects again. i'm really hoping we get through a lot of fun outdoor projects this summer, and i can't wait to share them all!

upload.jpg
upload.jpg

a fence, finally.

jenn pan

when we last left you in SEPTEMBER, we had just pulled up the bougainvillea plants adjacent to the chainlink fence in preparation for a replacement redwood fence. it took some time to get scheduled, but we finally got a date of october 28 for the installation. we were so excited. above and below are a reminder of what the chainlink looked like before anything went down.

hello, neighbors! 

the other thing we had to do before the fence was installed was pick and purchase the stain we wanted on the redwood. the fence installation company charges for stain at-cost, so we also had the option of buying our own. we bought a redwood two-by-four, cut it down to four equal pieces and tested penofin's ultra premium red label transparent wood stain in western red cedar, redwood, sable and sierra. sierra felt too orange, and sable too dark and somewhat splotchy. the red cedar and redwood were very close, but redwood won out because it was a bit less yellow. we bought three gallons of the paint from local paint store jill's and were SO ready to have an awesome new fence!

the installation for this project was supposed to be three days: dig holes and install footers and posts on the first day, and put up the horizontal wood board and stain the next two. nothing to it, right?

DAY ONE.

an hour after we left our house, we got a call from the installers that a city inspector had come by and because we didn't have a permit, they had to stop the work. according to all of our prior research, anything less than six feet tall didn't require a permit. apparently, that particular code had recently changed to anything less than 18 INCHES now requires a permit. so, this is what we came home to:

the only work they had done before the inspector showed up was the digging of three holes and their posts, as well as the removal of the random partial chainlink. and this was how the side of the house continued to look until after the new year. why? let's talk about it.

skip the copious amounts of text to the next photo if you don't want to do any heavy reading...

DAY TWO.

we went and got the permit from the city. everyone was super nice and helpful, but the process was kind of crazy. because the fence is something on the exterior of the house and visible from the street, it could require a design review. this is a minimum of $3,000. and it involves sending a public notice to everyone who lives within a certain radius of the house to make sure no one has any objections. if the change one is making is minor enough, or deemed to not require such a crazy process by the city, then the permit can be "design review exempt". however, the signature alone for something to be design review exempt is $300. lesson learned: when we decide to do anything to the exterior of the house (including changing out windows) apply for it all at once to potentially minimize the cost! 

the other crazy bit is that we had to show in the plan that the fence would be, in its entirety, on our property. it is possible to have a fence straight down the property line, but that would require a common wall agreement with the other property owner, and that paperwork starts at $2,000. anyway, we made the proper adjustments to all the plans, got buy offs from design review, engineering, walked over to the department of water and power building to get buyoffs from both electrical and water (since holes were going to be dug), back to the permit office for final building review and THEN finally paid for the permit. which came out to over $600. we paid over $900 that day because we decided to also just get the permits for the doors at the same time, to be safe.

DAY FIVE.

so at this point, you would think we could move forward, right? well, there was a bit more confusion. we couldn't just have the fence guys come back and finish everything - for fence installations, the city also requires a footing inspection before any additional work can be done. we would need the installers to come back, and finish digging all of the holes, as well as remove the posts they had already put in and redig those holes as well. to be extra safe, we called the inspectors office to see what the stipulations are for passing that inspection, and they said a survey would be required to show that all of the footing was entirely on our property. we inquired a few companies and a single property line survey would cost at least $1,500.

DAY TWELVE.

by chance, while walking sanford, i discovered our property markers on the side of the house (we're a corner house). and lo and behold, also found one on the property line in question! what a huge weight off our chest! however, this was right before the holidays and between our travel plans and the installers schedule, we wouldn't be able to get back on the schedule for awhile.

DAY FIFTY.

this was the day the installers were supposed to come back and pull up the posts and dig the remaining holes. however, we got a ton of rain, and they had to postpone. moving along..

DAY SEVENTY.

this one wasn't even scheduled! we just came home and found our side yard looking like this:

who called CSI?

they came and dug the holes!! total ninjas. we were pretty stoked. time to call the city to do the footing inspection.

DAY SEVENTY-THREE.

footing inspection PASSED!!!!!!!!!!!!!!!!!! we can finish the fence! this took more scheduling..

DAY EIGHTY-FOUR.

posts, round two. still looks like a crime scene, but we're making progress.

view from our front porch.

DAY EIGHTY-FIVE.

the put in the wood posts and filled the last inch of the holes. and this is why i love our installers, they even put in a form so that it went exactly to the property line. they even had time to start putting up the redwood boards on our side!

taking shape.

NO MORE GAP.

DAY EIGHTY-SEVEN.

IT'S DONE! all the boards are up on both sides, and stained beautifully! we're seriously in love with this fence.

we didn't want it to be too imposing, so once it passes our porch, it goes from being a 6' fence to a 42" fence.

which ends in a cute new gate with black hardware.

isn't it adorbs?

now we have a great enclosed area off the side of the house. we're hoping to turn this into both an outdoor entertaining space (just off the kitchen) as well as a nice area that sanford can run around in (thus the gate).

we're infatuated with the final product. we are so appreciative of flavio and his team from five star fence for the attention to detail and stellar job they did, and for working with us through the whole, crazy process.

but we still need to pass final inspection. 

DAY ???

in preparation of a fence.

jenn pan

the fence separating our home and our new neighbors is chainlink. this is leftover from the previous homeowners, and used to feature barbed wire at the top. luckily, that part was taken down several months ago.

upload.jpeg

we got an estimate done to replace the chainlink with a redwood fence, and are moving forward with it. the fence posts will be set right into the concrete. however, there are three bougainvillea plants right where the fence would be going, so we we needed to dig them up.

upload.jpeg
limited space for digging due to the concrete.

limited space for digging due to the concrete.

the smallest and easiest to handle of the three bougainvilleas.

the smallest and easiest to handle of the three bougainvilleas.

we are happy to move these guys too, because they haven't been thriving in their little concrete box. it wasn't all that easy to get them up either. the biggest of the three (not pictured) and roots that went down pretty far, and trying to dig them up without damaging the roots was really hard. we probably weren't successful either, but we've got them in pots and our fingers crossed they'll survive.

the bougainvillea repotted. as you can see, there is little privacy with a chainlink fence.

the bougainvillea repotted. as you can see, there is little privacy with a chainlink fence.

all clear! hopefully we'll get the contractor scheduled soon and the chain link will be gone and replaced with a pretty redwood fence. we've got big(ish) plans for this space! more of that to come in time..

view from the street of this unutilized space between the two houses.

view from the street of this unutilized space between the two houses.